Cynthia's
Architecture Degree Portfolio
Computer Applications - Work in Progress
All about my work progresses in the module Computer Applications this semester. To further view the images shown below, click to enlarge them.
Project 1 - 3D Model


Project 2a - Exterior Renderings


Project 2b - Interior Renderings


Project 3 - Animation
Week 1 (24/03/2014)
First class of 3D Max. We were asked to draw whatever we want after a session of brief introduction to 3D Max, and I managed to draw a bear! It was so fun, and at the same time challenging to me. Here's some print screens of my work!


Week 2 (31/03/2014)
This week we are to show the building that we have chosen to draw in 3D Max as part of our assignments. I have chosen my Design Studio 2 final project as the building, and it has been approved! Below are some information regarding my building.


Project 1
Model of an Architectural Design
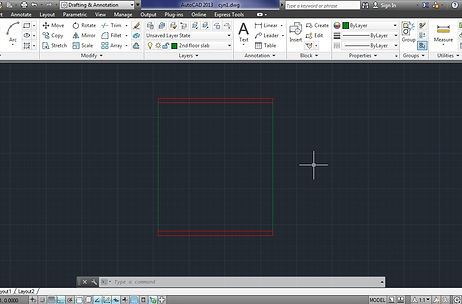
This project starts from week 3 onwards. So I started my work by importing my image of the floor plan into AutoCad software. From there, I scaled the image according to the actual dimensions of my building, and then traced my floor plan, as shown below.


After I finished my floor plan, I continued with my roof plan, first floor plan and elevations.


After finishing up with the cad files, I made sure that there are perfect, all polylined and in different layers, so that it is easier for me to extrude them later. I transferred and imported the CAD file into Rhinoceros software, as I find that Rhinoceros is more user-friendly as compared to 3D Max. From there, I extruded each wall, stairs, windows and doors to the desired dimensions.


After extruding, I proceeded with more details like door jambs, door panels, glass panels, and many more.


After detailing, I confirmed that there are no loop holes or any other technical errors first before proceeding to layering the extrusions. I select the extrusions that are similar in material, and layered them respectively. There are concrete, glass, aluminium and timber materials in my building.


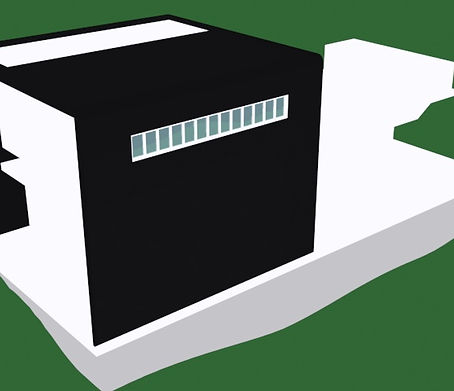
After that, I joined the levels of the building together, and made sure that everything is correct in terms of dimensions, layering and color. This is the finished product of my building! Yay!

Later, I imported my finished building into 3D Max for rendering, and also to check if there's anything wrong during rendering. Luckily, everything is fine! My building looks beautiful after it is rendered!


After that, I drew a plane under my building, and using the push/pull tool I created my contour by adjusting to the desired heights.

Later I rendered my contour with my building and tadaaa! It's officially done for Project 1! :D


Project 2
Exterior Renderings
This project requires us to do exterior renderings of our building. It is indeed very challenging for me, as I have waited and waited for so long just for the rendering of little details to finish. My computer is so slow! Thus, time is limited and I was very rushed for this submission. Here's my WIP, and I hope you enjoyed it.
I started by bitmap-ing the materials that I want onto my building, as taught in the tutorial sessions.
The materials in my buildings are :
- Black concrete for the main wall
- White concrete for the rest of the walls
- Aluminium window frames
- Black timber for stairs, doors and door frames
- Transparent glass for any glass elements present


After putting the required materials on the exterior, I thought I could might as well add materials on the interior too, since my interior is rather empty. Thus, I proceeded with my stairs and doors, door frames. I spent a lot of time questioning myself which timber colour I should use for the interior structures, and finally concluded with black timber as to suit the black concrete wall on the exterior.


I moved on with the contour, by adding a bitmap to the contour like everything else, rotated the bitmap and bump it.
Turns out, my contour looked really natural! and I liked it so much!

Later, I drew a plane and converted it into crystal clear water, but I just couldnt understand why my water wavelengths are so small? I've tried and tried to adjust and have not slept througout the night because of the water texture. In the end, I just decided to go with this texture, as I could not do anything else.

This is the final texture that I have decided to go with.

After a good sleep, I continued with the light fixings of my building, and got really lost at first. But here's the progress of the lightings!

This lighting was too low, and too dark, so I have made changes to it.


This is the final lightings that I am very much pleased with! BUT rendering takes sooooo much time! I think I need a new computer.


These are some of the interior renderings that I made, playing with the lightings, oh so much fun! But something wasn't quite right... so I changed the type of light for the lightings...

Everything looks so beautiful with yellow light! I love it! But I dont know why, when rendered my building's environment turned out to be like this.... and yet this took me about 30 mins to render already, I couldnt just let it go like that, right? So I saved it,.
After all that drama in 3D max, i finally found two suitable views for my building. However, they are night views.

This is the first view, that is the eye level view, at night. This is unedited yet.

I found a tree in google, edited it in photoshop and placed them into my view.

Not sure if you can see them, but I've put 10 trees of the same kind into my view, to make my building look like it's in a dark forest. I've also distorted the trees, so they look like bushes below my building.

I've done the same for this scene as well, as you can see it's sooo dark!

...and tadaaaa this is the final outcome for this night view! :)
Then I proceeded with my morning view! I added daylight, the mr sun and mr sky into in 3dmax, and rendered accordingly.

However when i test rendered it, my mr sun and my sky did not show up, and it took me very long to finally get the right angle, without seeing the mr sun. Also i decided to just render without the mr sky as it never showed up and decided to photoshop sky in instead.

This is the view that i finally decided to go with, where I can't see the sun, and the brightness is just right.

See what I meant? mr sky never showed up, making my scene looked like its nightime, and mr sun's luminosity is so dim. but anyway, this scene took me around 1.5 hours to render. hahaha

I brightened up the image to the fullest, added my sky and did a fake reflection on the water. My building looks so much more alive now!

Later I proceeded with adding trees, and rocks etc etc into my view so it will look more natural.

Here is where the magic happens. With just the smudge tool, eraser tool and playing with layers, i managed to make my water looked like its overlapping my rocks! So it looks more natural! I'm so happy!

From there, I just continued with playing with the intensity of each elements, the brightness, levels, contrasts, etc.

And yup! I did it!!!!! It's so pretty and much much prettier than the night scene!! I'm so happy :)
Project 2b
Interior Renderings
This project requires us to do interior renderings of our building. For me, this project is very fun and challenging at the same time! I must be as detail as I can, so my interior spaces will look realistic and beautiful. Anyway, I really enjoyed myself for this project. Here's my WIP and I hope you enjoyed it! :)
I started by doing an online shopping of furnitures in 3darchive.com. Later, I set the camera views to the respective interior view that I liked.
The first view is my living room, where the main attraction is the full glass wall and roof.

Here's a plan view of my living room, and the placement of the camera. As seen here, the camera is able to view my kitchen through the opened door. Thus, I also added furnitures in the kitchen.


Later, i proceeded with add furnitures in my living room.

I downloaded a man as well, so I can scale my furniture according to the human scale.

Test render. I realised the room is too dark, so i adjusted the mr Sun for a brighter room.


Then, I changed my camera lens so that I can view my interior space even wider, and so it will look bigger as well.
I continue to add my furnitures into the space. Lighting were added as well.

Test render.


After I add all furnitures and have confirmed with the lightings, here's my final outcome of test rendering!

Later, I editted the image in photoshop, to make my plant look more realistic.

Second View
My second view is in the bedroom, thus i downloaded the furnitures I want again, and imported them one by one into my view.

I added the bed, then the puff next to the bed, just like how we always see it in hotels. I scaled them according to the man template.

Since materials are empty when imported, i bitmapped my own choice of material into each of the components of my furniture.

More furnitures are added.

I used target light for all of the lightings in this bedroom, as I want a more subtle lighting effect, as my bedroom does not need much light as it is partially outdoors.

More furnitures are added, and materials too. This is the workspace for the user in my building.

Coffee table and chairs are added as well, to occupy the space and it looks empty.

To make things look better, i added books as an extra detail, so the table won't be so empty.

I adjusted the lightings in this room, and also the materials of each object.
After one night of rendering, I realised that something was wrong with my blanket! I was so disappointed but I couldn't render again, as my computer was very hot already after working overnight. So, i decided to photoshop my blanket, hoping it will fit into this scene.

I used the clone stamp tool, to clone the existing blanket's colour slowly to the holes. And to my surprised, it looked great!

After filling in the spaces, I used hue and saturation to adjust the intensity of the blanket, so it fits better into the scene.
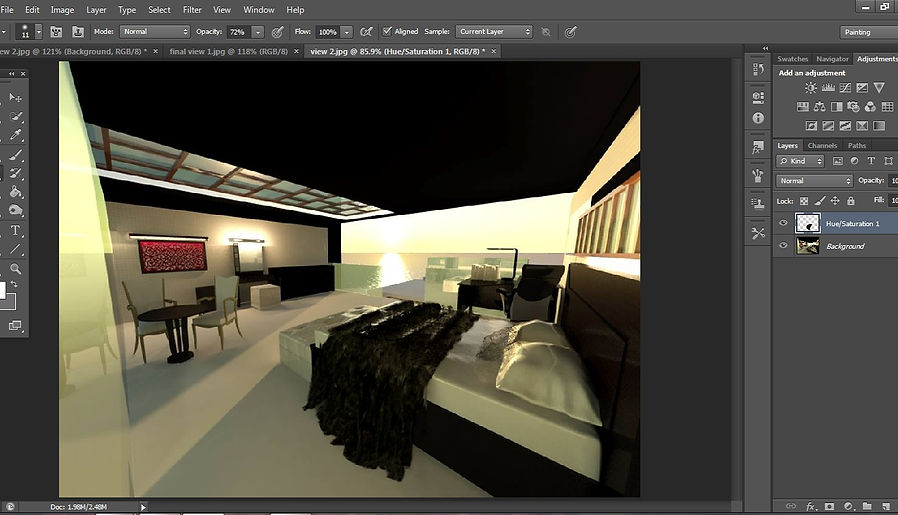
After all that, I merged all the layers, and adjusted the brightness and contrast, to make my room looked better. And I'm so happy it turned out so well! :D Here's my final rendering of my room! :D hope you liked it!

Project 3
Animation
This project requires us to make a short video of not more than 1 minute and 30 seconds of an animation about our building. We were allowed to choose our own genre of video, and I have chosen to do a commercial video. It is like how the hotels and resorts would introduce their facilities via video.
One problem I faced while doing this project, is of course the renderings time. The maximum number of frames that i have rendered in one scene is only 25 frames, and my computer would take up to 24 hours to finish rendering them. It was indeed very disappointing. However, my video turned out to be great, and i'm so pleased!
Here's my work in progress for this project.
There are mostly repeating steps, so I will only show some of the works.
The steps are :
- moving the camera and target in the building
- setting the keyframes for each object
- setting keyframes for each camera
- moving each objects along the keyframes
- synchronising the camera and sunlight

This shows the rendering of my entrance, which took up to 5 hours for just a few frames...

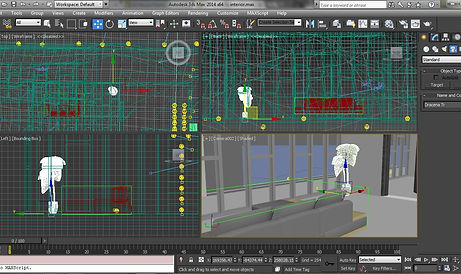
This is how I synchronised the objects with the camera along the keyframes.

I saved this as a different file, deleted all the exterior and interior lightings, and the rendering time got faster!

I sync-ed the sunlight with my camera when it moves, so the view looks more natural and realistic.

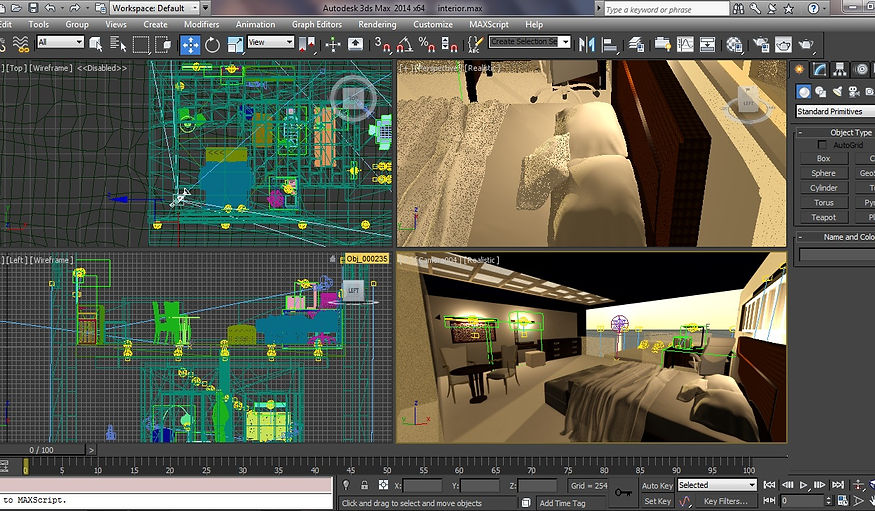
I added extra furnitures, and sync-ed the camera with the sunlight again.
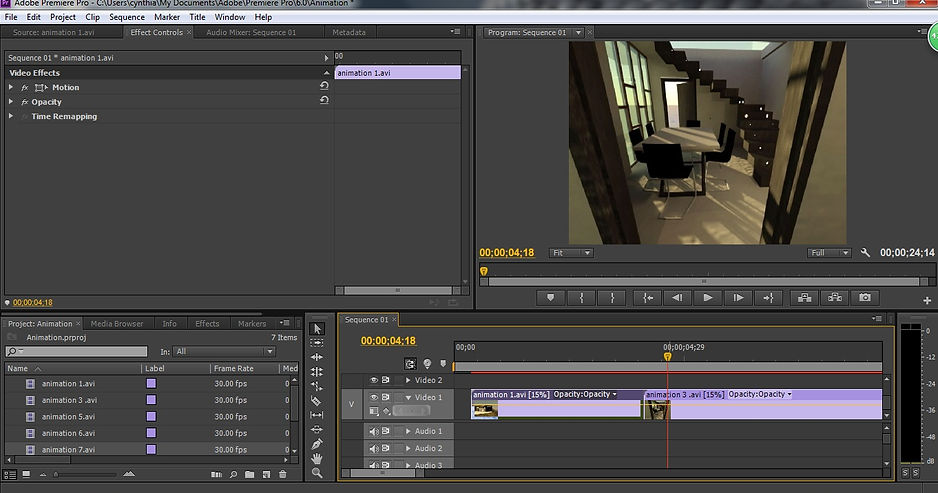
After 5 days of renderings, i finally can move on to editting my animations to a video. I used Adobe Premiere Pro to edit the video, so i could make the animations' speed as slow as i want because after it finished rendering, the animation was too fast to view.

Then, i added subtitles, titles, and music to the video. I arranged the scenes accordingly and synchronised most of the scenes with the music, so the video is more complete.
And, this is my final video!!!! I'm so happy of my work. Although it might not be the best video or animations as compared to the other students, but at least, I have tried my very best with my old laptop. I've enjoyed myself very much for comp app this semester! :)
Thank you for reading! Hope you enjoyed my WIP! :)